What Is a T-Profile Inlay, and Why It's Not Just a Trim
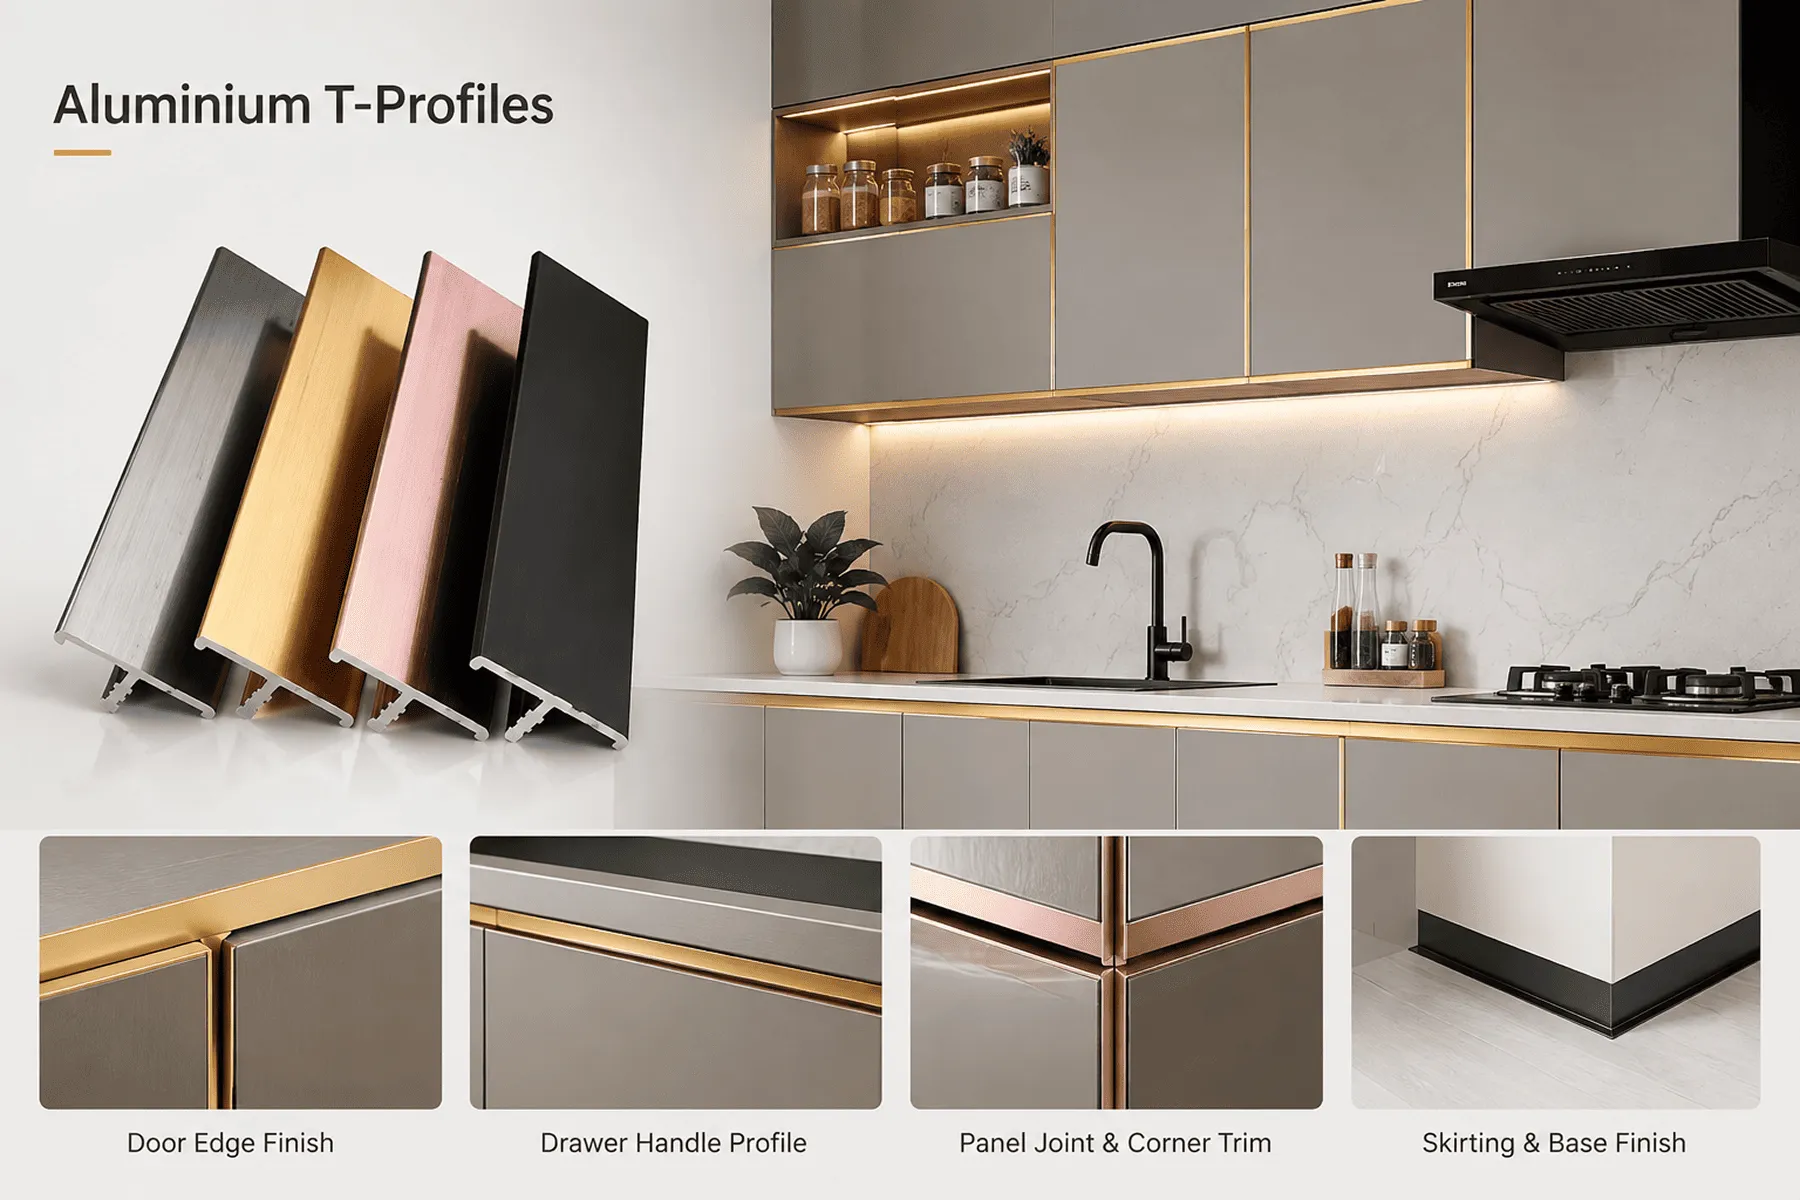
Walk into any premium interior fit-out finished in the last few years and you'll likely see a thin metallic line running along a wall panel joint or wardrobe shutter border — that's almost always a T-profile inlay at work. Unlike a surface-mounted trim strip, a T-profile is designed to sit flush within the material itself. Its cross-section has a serrated leg that grips into a routed groove cut into the wood or panel substrate, leaving only the flat T-shaped cap visible on the surface. The result is a crisp, jewellery-like accent line that reads as a deliberate design choice rather than an afterthought. Because the visible face is anodized aluminium rather than brass or steel, it also resists tarnishing far longer — a detail that matters on a five-year-old reception wall as much as a brand-new one. For designers specifying this detail for the first time, the Aluminium T-Profiles range covers the available widths and finish options in more depth, and is worth a look before finalising a panel design.
Part of the appeal for contractors and furniture manufacturers is how lightweight and easy the sections are to work with on-site. There's no welding, no specialist tooling beyond a mitre saw, and no risk of the corrosion or discolouration that eventually affects brass or mild-steel inlay strips in humid Indian climates. That combination of a premium look with straightforward fabrication is a big part of why T-profiles have become a default detail rather than a niche one in mid-to-high-end residential and commercial interiors. The serrated leg also means the finished inlay stays put once bonded — there's no risk of the strip lifting at one end over time the way a purely adhesive-mounted trim eventually can.
Where Interior Designers Actually Use T-Profile Inlays
The T-profile's job is almost always the same — creating a clean separation or accent line between two surfaces — but the applications vary by project type. Some of the most common placements include:
- Wall panelling joints — a metallic line where two different panel materials, such as fabric-wrapped MDF and veneer, meet, turning a functional seam into a design feature rather than hiding it.
- Wardrobe and cabinet shutter borders — a mitred rectangular inlay framing a flat shutter face for a tailored, furniture-grade look that reads as custom joinery.
- Geometric furniture detailing — herringbone or chevron patterns on cabinet doors and feature walls, built from multiple mitred lengths joined at sharp angles.
- Flooring transition strips — doubling as a border between tile and wood flooring, a role the same T-section handles without any modification to the profile itself.
- Commercial reception and lobby panels — mitred corner joints running the full perimeter of a feature panel for a premium first impression in hotels, offices, and showrooms.
Planning the Groove and Corner Details Before Fabrication
Because the T-profile's leg is serrated for grip, the routed groove has to match its width precisely — stock runs from 6mm up to 25mm, so the groove size is one of the first decisions in the panel design, not an afterthought to be solved on-site. A narrower 6mm to 10mm profile suits a fine accent line on a subtle feature wall, while the wider 20mm to 25mm end of the range reads as a bolder, more structural-looking border on a larger panel or shopfront-style reception wall. Corners are mitre-cut at 45 degrees so two lengths meet in a clean point rather than a butt joint, which is what allows the profile to wrap a full rectangular border on a shutter or wall panel. The leg is generally set with a small bead of high-strength industrial adhesive once inserted, giving a permanent, rattle-free fit rather than relying on friction alone. Fabricators typically cut and pre-fit the groove in the workshop, where panel edges are square and tooling is more accurate, rather than attempting it after the panel has already been installed on-site.
The single biggest mistake we see is a groove that's routed to a generic size instead of the exact profile width — a groove cut two millimetres too wide leaves the inlay loose and the adhesive bead visible. Match the groove to the profile before you cut a single panel, and confirm the width with your supplier before the whole batch goes through the router.
Matching the Finish to the Room
Finish choice tends to follow the same logic as any metallic hardware decision in the room. Gold and Rose Gold — produced with a PVD-style anodizing process rather than actual plating — read as warm and premium, and hold up to daily handling far better than gold-plated trims, which scratch and dull with repeated contact. Brush Finish sits closer to a satin steel look for a more understated line, while Black Matte is the common choice when the inlay needs to disappear into a dark cabinet or wall scheme rather than stand out as a bright accent. All of these are extruded from 6063 T5 aluminium conforming to IS 733, the alloy grade chosen for the dimensional precision needed in a leg this thin, and are wholesaled in standard 3.0 and 3.66-metre lengths so fabricators can plan panel layouts around full, uncut sections. For a full look at how these inlays sit alongside other decorative sections — corner guards, skirting, slim tracks — the Interior & Decorative range is the place to compare finishes side by side before finalising a specification.
Specified well, a T-profile inlay is one of the lowest-cost ways to add a genuinely premium detail to a fit-out — it just needs the groove, corner, and finish planning to happen at the right stage of fabrication, not after the panels are already cut and it's too late to change course.